The Adult and Kids Camden Cardigan Patterns are so good, but you know we couldn't just leave it at just a basic cardigan! That's why we're so pleased to show you a few cute hacks that our team has put together for you, so that the Camden is now even more versatile! Read on as we show you how to add buttons and a kangaroo pocket, a fur trim to the hood, cute kitty ears, and even turn the Camden into a dress!
Adding Buttons, an Elastic Waist Casing and a Kangaroo Pocket:
I really love the Camden Cardigan. It’s very comfortable, can be dressed up or down, and is different from most cardigan patterns.
After I made my first one, I was inspired to try something different with this lovely coral sweater knit fabric I’ve been holding onto. My hacks are changing to a button front and elastic waist casing, and adding a kangaroo pocket. And I absolutely love it!!
You will need the Camden Cardigan pattern and the kangaroo pocket pattern from our Denver Hoodie.
You will also need 1/4” to 1/2” elastic (or you can use the drawstring from the tutorial if your fabric has good stretch), knit interfacing, and 3/4” to 1” buttons. Snaps can also work.
I used 1” buttons. My size is L (graded to S in the shoulders) for reference. I used my drawstring since I had cut it out, but elastic will save time and a little fabric.
To begin, we will need to adjust our front pattern pieces before cutting our fabric.
These pieces are: front upper, front lower, front hem facing, and front facing.
Before cutting out your pattern pieces, use your acrylic ruler to add 1/2” to 1” from the front edges (the amount will depend on the size of your buttons and preference).
I added 3/4” to the front edge of my pattern pieces, as you can see in the photo.
Now you can cut out your fabric.
and follow the directions in the pattern tutorial to step 40.
SKIP STEPS 40 and 41. You will not need buttonholes or grommets for this hack. You can continue through step 51.
Now that you’ve completed your casing, use a bodkin or safety pin to feed your elastic or stretch drawstring through your casing (fig 1).
On one side, with the end of your elastic (or drawstring) peeking out, smooth your fabric flat. I clipped my end in place to be sure I wouldn’t pull it back in. (fig2).
Measure 1 1/2” from edge of garment and mark with chalk or vanishing pen (fig 3).
Stitch from the top of the casing to the bottom of the casing at that mark to secure your elastic (I sewed over it a few times to be sure it wouldn’t get loose) (fig 4) now pull the edge of your elastic or drawstring and clip it 1/4” long. This reduces the bulk in the casing where your buttonhole will be. You can see the little lump inside where it’s 1/4” long inside the casing in fig 5.
Your casing is all set!
Now you can continue through the tutorial to step 69.
Before assembling your casings, you will need to add interfacing to the front edges of your jacket, to stabilize your button and buttonhole area.
Now we cut our knit interfacing 1 1/2” wide, and the length of your bodice facing. You will need 2- one for the right and left. Place the interfacing bumpy side down on the wrong side of your facings- on the long edge, from the neckline to hem (see pic). Iron in place, using plenty of steam to be sure it’s secure.
You’re going to be doing the same to the front edge of your garment. Measure from the neckline to hem for the length of your interfacing, and also make these 1 1/2” wide (cut 2). Iron to the wrong side, just as you did for the facings.
If you are making a hood, return to pattern instructions, step 52. Stop before construction of hem facing, step 69.
***********************
Now we will work on the kangaroo pocket.
If you are making the Top Length cardigan as I have, you will need to adjust your pocket length.
( If you are making a longer option, follow the pocket directions for the Denver hoodie, then fold the bottom of the pocket to the inside to enclose the edges- baste this edge closed. Then topstitch per the pocket diagram.)
Let’s start with Denver Hoodie pocket pattern piece and our front lower cardigan piece for this adjustment.
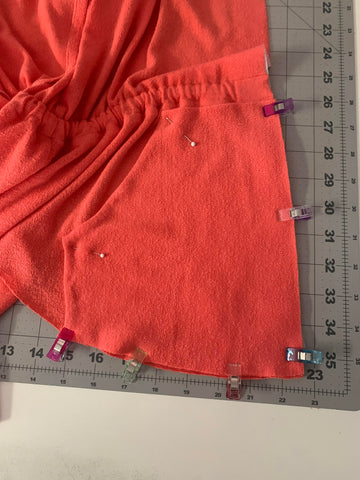
Before you cut out your pocket pattern, leave an extra couple inches of paper at the bottom edge, so we can extend it to meet the edge of our cardigan. Fold your pocket piece in half, making a crease. Open it up again, but don’t flatten it out all the way. Line that crease up with the edge of the front lower cardigan pattern piece, while also lining the top edge of the pocket with the pocket placement guide. (See photo). Trace the bottom edge of the cardigan pattern onto the pocket pattern. Cut the pattern on that line.
Now use that pattern piece to make your pocket, following the directions included in the Denver hoodie instructions.
Now everyone will take their pocket pattern piece, fold it on the crease, lay it over your pocket aligning on the side, top and bottom. This will give you the center of the pocket. Cut on that line, divide in your pocket into to even pieces (right and left pockets).
Place your right pocket onto the lower front cardigan, lining up the cut edges- the top edge should line up with the pocket placement marks from your pattern. Pin the pocket in place, and baste the cut edges. Do the same with the left pocket.
You can go back to the instructions again to assemble your casings, and sew them into your cardigan (steps 69 to 83). Topstitch the edge as per instructions if desired.
BEFORE step 84, roll your loose pocket edges up and out of the way, Otherwise it can get caught in your topstitching you secure the hem facing. We don’t want that! I rolled mine up and clipped them, and I had plenty of room for steps 84-85.
When that’s all done, topstitch the pocket tops and sides.
Almost there!
Decide how many buttons you want yo use- one will be on the waist casing. You can use just one, two, three like me, or all the way to the top.
I put my top button at my bust. My buttons are spaced a little over 4 inches apart. When you decide how many buttons you want to use, space them evenly and mark the right side.
Then follow the buttonhole instructions for your sewing machine. You can probably find a YouTube video that can help if you have questions. It can differ from machine to machine, so I really won’t be able to address it adequately here.
When you have your buttonholes in place, Fold the placket over, overlapping 1 1/4”. Mark a dot in the center of your buttonhole onto the fabric below. This will mark where you will sew your buttons. Either handstitch or use your machine’s instructions to attach the buttons to your cardigan.
Give it another quick press to sharpen all the seams, and you’re done! Yay you!
Be sure to share a picture of your make in your So Sew English fabric in our Facebook group and Instagram. I can’t wait to see!
Adding Fur Trim to Your Hood:
Adding a fur trim to your hood is an easy way to really make a statement with your cardigan, or any other hooded garment. The process is simple and only adds a few steps to the construction of your garment.
Step One: Sew your two outer hood pieces together and sew your two hood lining or facing pieces together.
Step Two: Measure around the raw edge of your hood opening. This will be the length of your fur strip. The length on mine is 21 inches.
Step Three: Decide how wide that you want your fur strip to be. Once you decide on the width, double that and add 1/2 inch for seam allowance. I wanted my fur to be 2 inches wide around my hood. 2 x 2 = 4 + 1/2 = 4 1/2 inches.
Step Four: Cut your fur strip the length and width you got from the previous two steps.
My strip will be 21 inches x 4 1/2 inches

Step Five: Wrong sides together, fold the fur strip in half widthwise. Pin/clip the raw edges together.
Step Six: Line up the raw edges of your folded fur strip and the right side of the outer hood. Pin/clip.
Step Seven: Right sides together, line up the raw edges of your hood lining or facing where the outer hood/fur is pinned. You are sandwiching your fur in between the hood outer and the lining/facing. Pin/clip.
Step Eight: With a 1/4 inch seam allowance, sew all the way around. Go slowly and make sure your are catching all four layers of material.

Step Nine: Flip the lining/facing to the wrong side of the hood outer. If you did only a facing then you will want to topstitch along the clean edge of your facing to tack it down.
Optional- Topstitch 1/4 inch in from the seam.

Adding Cat Ears to Your Hood:
Adding cute kitty ears to a hood is always a good idea, in my opinion! That's why I was so excited to write up this hack for the Camden. Here's how:
Step One: Cut four ears pieces- two fronts and two backs. I winged this here a little, but any triangle shape will do.

Step Two: Take one main ear piece and one back ear piece, and place them right sides together. Repeat for the other two ear pieces.

Step Three: Sew together the front and back ear pieces, turn right side out and press.

Step Four: Decide where you'd like the ears to go on your hood, and pin, wrong side of the ears facing the right side of the main hood piece. I liked mine about 1.5" from the center seam on either side.

Step Five: Attach the lining and hood facing to the hood main, sandwiching the ears in between, with all raw edges lined up.

Step Six: Turn hood right side out, and topstitch along the edge. This will enable the ears to stand up a little more. 
Attach the hood and finish the Camden as instructed by the tutorial, and admire those cute kitty ears!


Making a Camden Dress:
We all love cardigans, but what about turning your cardigan into a dress? The Camden Cardigan is a perfect base for a dress.
Here is how to make your Camden dress. Start by cutting your front bodice piece on the fold. I cut my length 4 inches higher than the duster length. The back bodice remains the same. The back neck facing remains the same. The front facing I cut on the fold at the crop line.
The hem facings for the bottom are not needed. Then select the sleeves length. I cut mine at the short sleeve length. Add buttonholes at the desired placement or as the pattern placement shows.
Construct the dress starting at the shoulder seams. Then add the sleeves. Following the sleeves, sew down side from the sleeve down to the dress hem. Sew the other side. Sew your casing per the tutorial instructions but it will be in the round.
Attach the facings at the ends per the tutorial instructions. Sew to the dress. At the V, clip in the middle but not past the stitch line. Turn and topstitch the facing down. Trip the bottom of the front facing once it is topstitched. Hem the dress bottom and sleeves.


